The Generation IV Dodge Grand Caravan (and its sibling the Chrysler Town and Country) is well known for requiring an annoying and expensive replacement of the front window regulators after a drawn out failure where they will gradually stop working. I finally got around to looking into the problem on my van this week and found the root cause to be easily fixable.
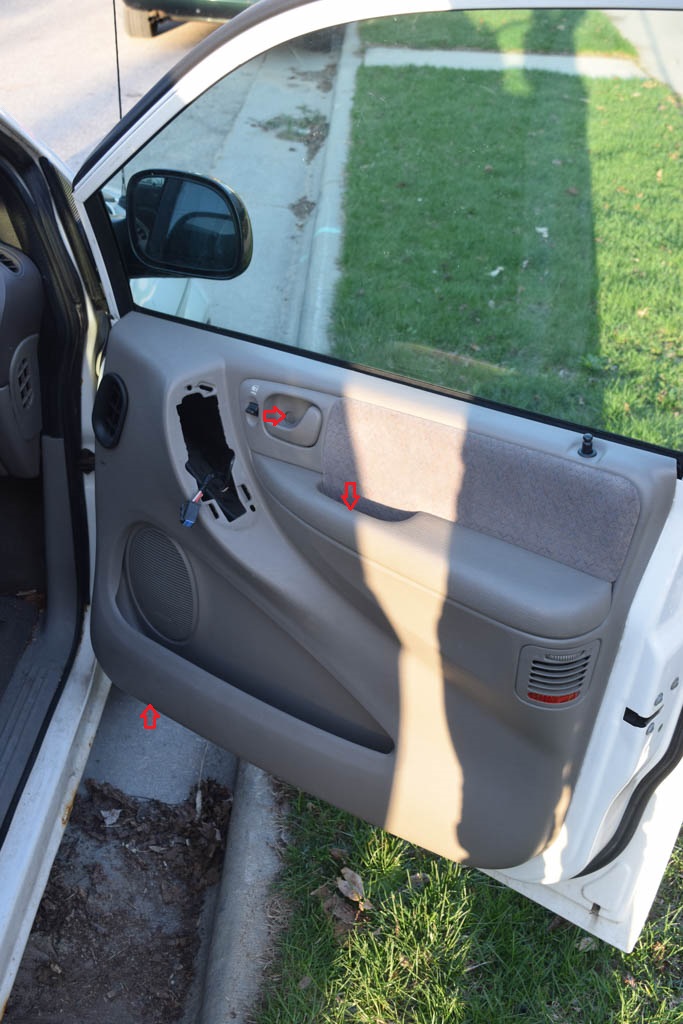
The window regulators are located underneath the front door trim panels, which are held on by three screws indicated by arrows in the picture below.
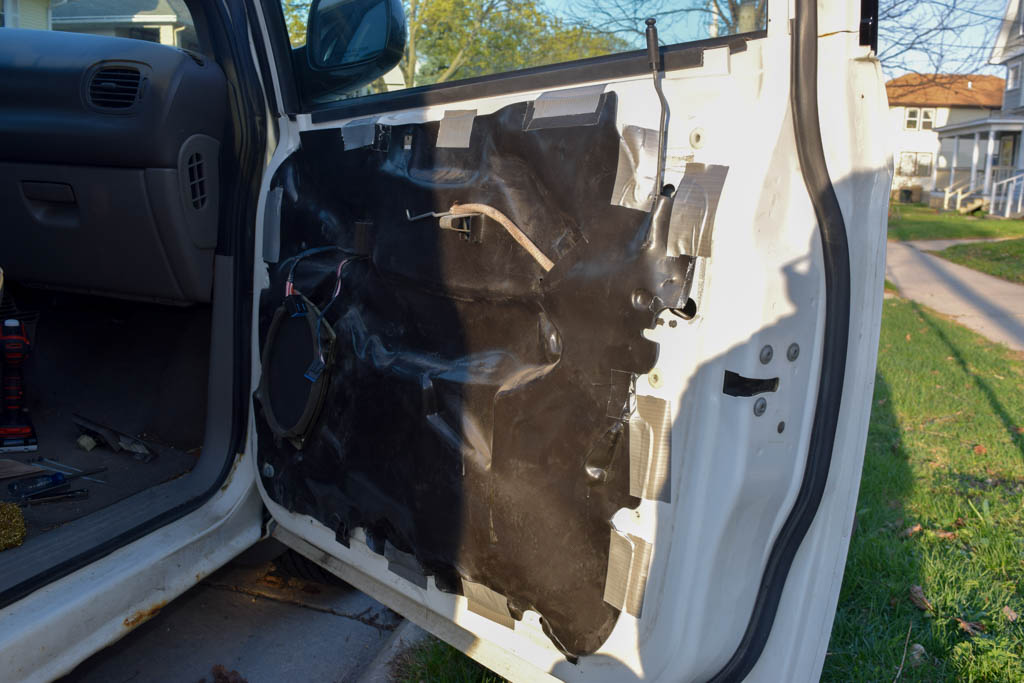
Once the panel is removed you need to remove the plastic moisture barrier which will expose the window regulator. Mine was held on by three extremely annoying screws that were glued into rubber grommets (why even use screws if you’re going to glue them?). I ended up just prying them out of the door; it was easier than trying to loosen the glue holding them into the rubber.
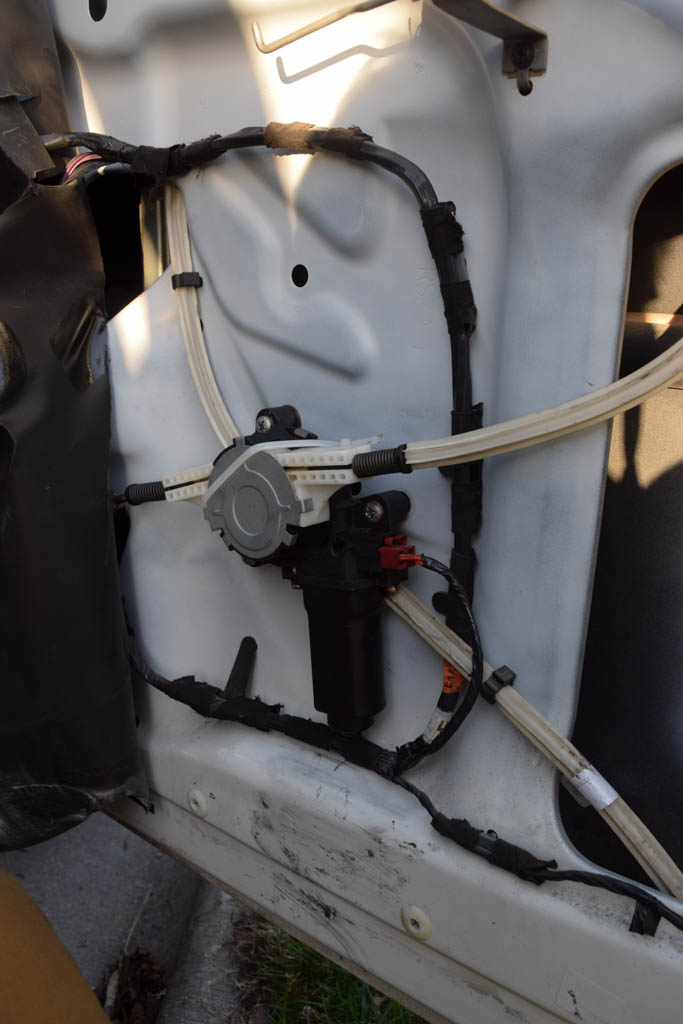
At this point, one option for repair is to buy both regulators from Amazon, where they will run you about $100 for both windows. In most cases the problem lies in the motor and not the regulator, but unfortunately the motor alone costs just as much as the full assembly. I didn’t want to spend $100 if I didn’t have to so I pressed on with disassembly.
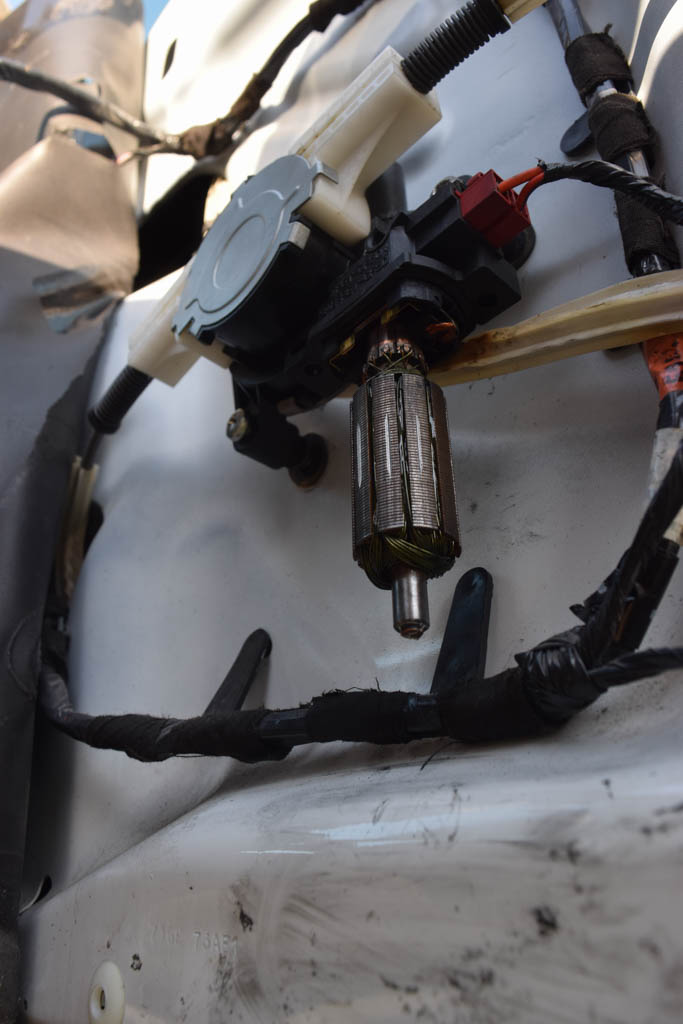
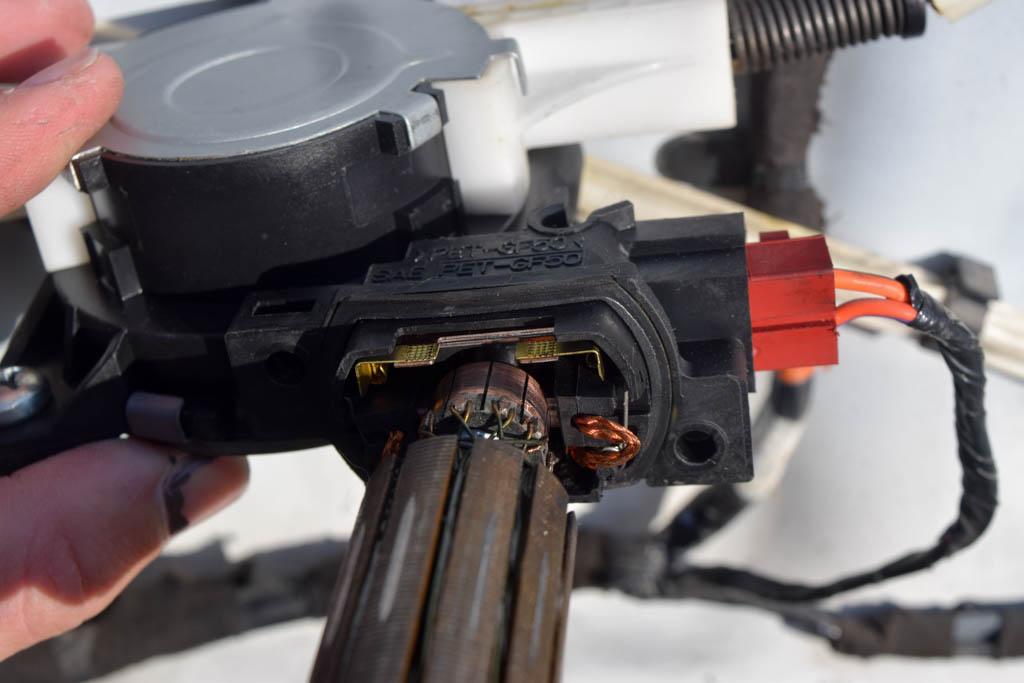
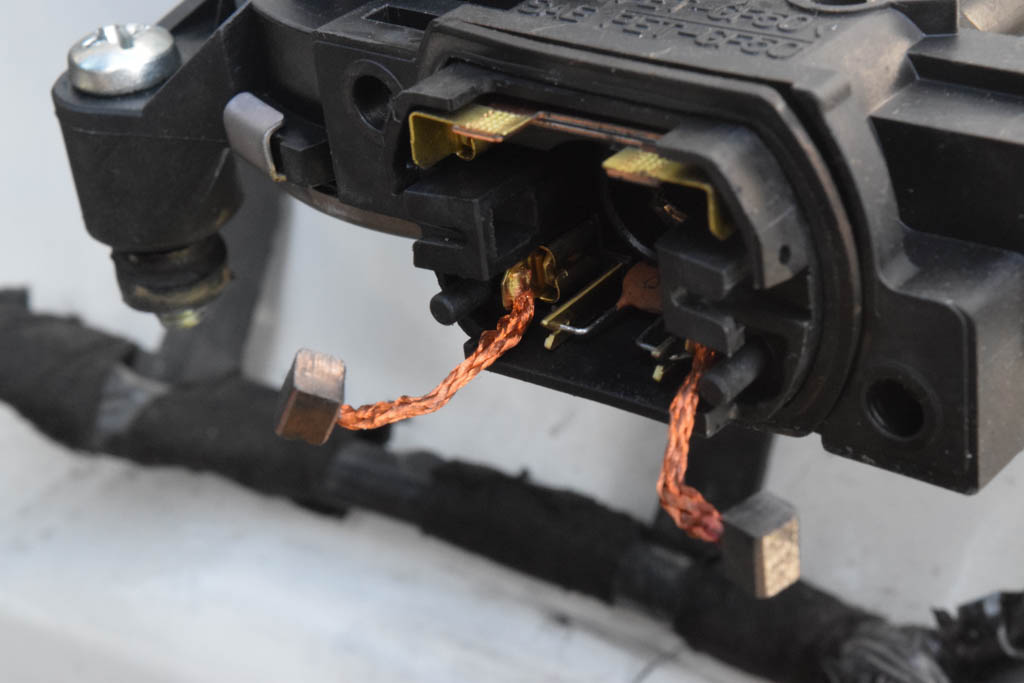
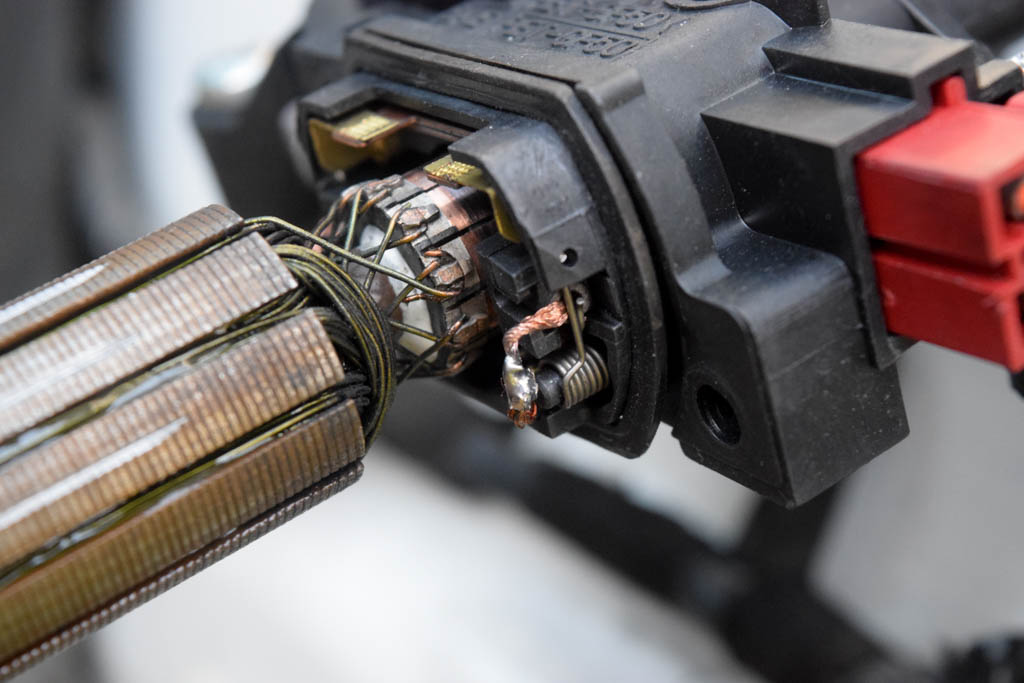
As shown, the bottom of the motor can be removed with two screws to expose the armature and windings. In the images below you can see where the brushes contact the commutator, in my motor the brushes were worn down to nubs.
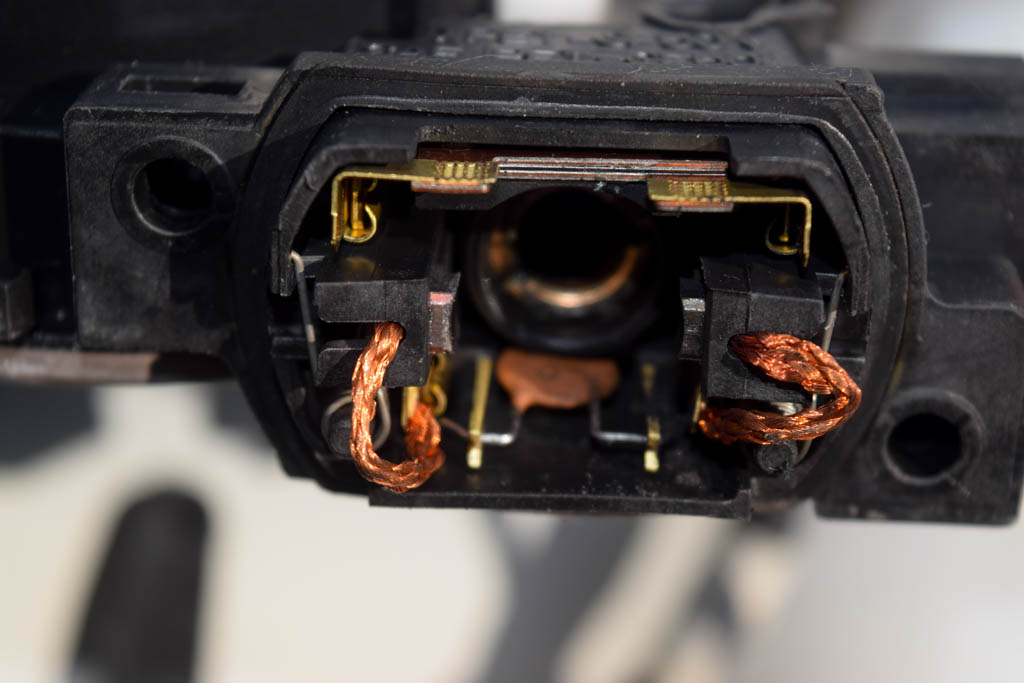
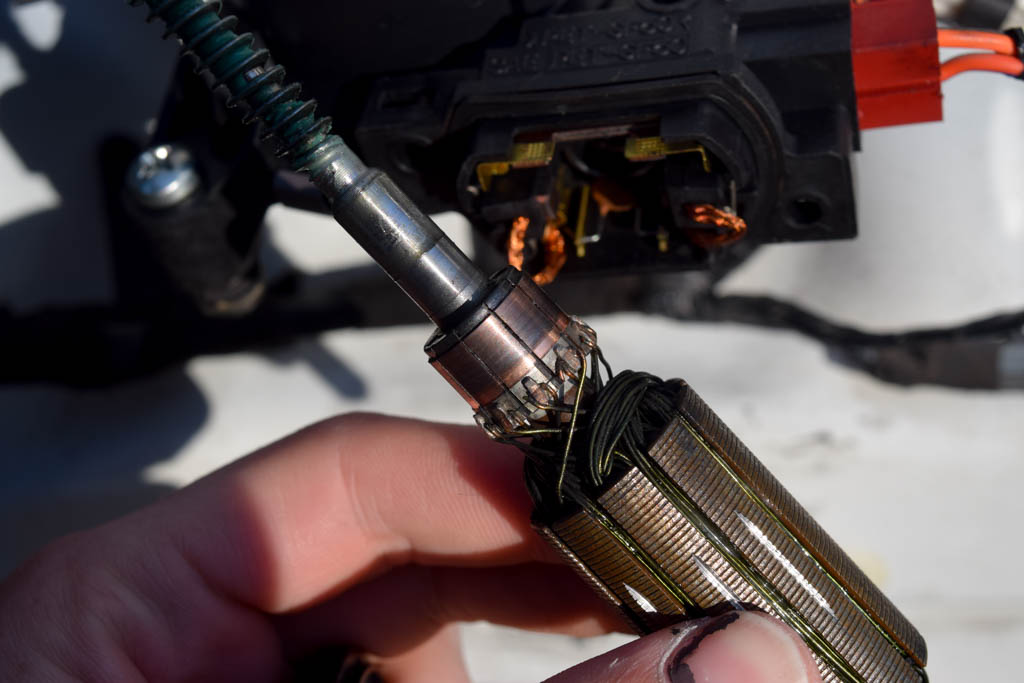
The commutator was almost black with carbon deposits, so I took it out and cleaned it with electronics spray. That was enough to fix one of the two windows; it seems that the motor had just gotten completely gunked up and wasn’t conducting electricity any more.
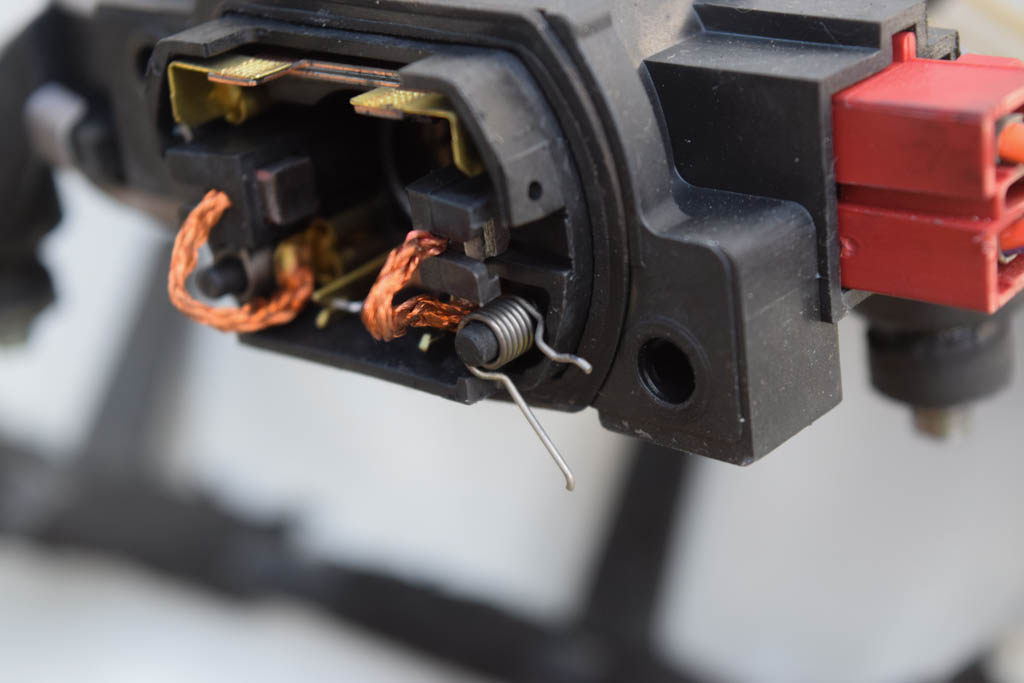
The other motor was going to need more work. Simply cleaning the commutator made no change, the brushes were just too worn. I removed the spring holding the brushes in and pulled both of them out.
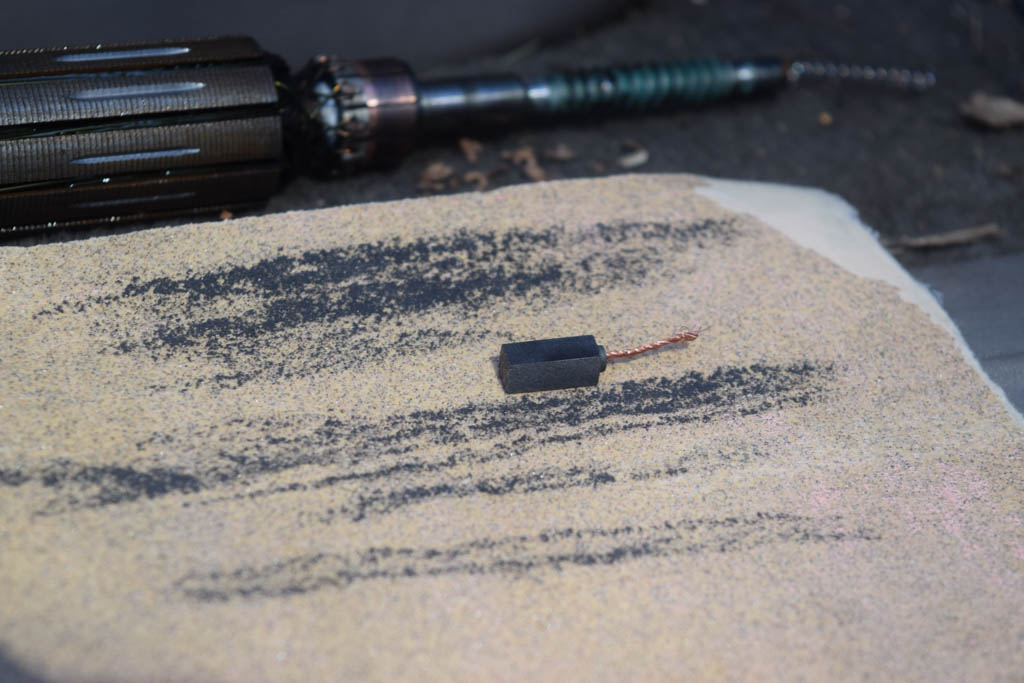
I ordered this pair of 5mm brushes from Amazon and they only required a bit of sanding to fit into the motor housing.
A little sloppy work with the soldering iron and they were reinstalled.
After that all that needed to be done was the reverse of disassembly. I ended up passing a zip tie though the holes in the door and looping it tightly around the regulator to hold it in place more securely because of the mess caused by the rubber grommets. I hooked the window switch back up and the window worked perfectly with the new brushes, and all for about $7. If you aren’t keen on dropping $100 to completely replace your window regulators I’d highly recommend looking at the motor brushes, because they seem to be the weakest link by far in the assembly. They may not technically be “user serviceable” but you shouldn’t let that stop you if you have even the smallest of DIY capabilities.
 Peter Den Hartog - Blog