The TCC clutch on my Chevy Express van has shuddered and had poor engagement ever since I purchased it. A common wear item is the TCC regulator valve bore, which causes fluid to leak past the valve. TransGo makes a repair kit which has a scarf cut o-ring to seal the valve bore and improve TCC engagement, even with substantial wear. This article is intended to serve as an informational guide if, like me, you’ve never removed the transmission pan from a 4L80e and don’t know how to approach the job.
I would suggest that you replace the TCC Electrical Solenoid while you have the transmission open. It’s cheap insurance so you don’t need to open the pan again. Otherwise the required parts are:
While you’re in there, I also suggest replacing the Valve Body Separator Plate. Mine had significant wear where each of the check balls seat in it.
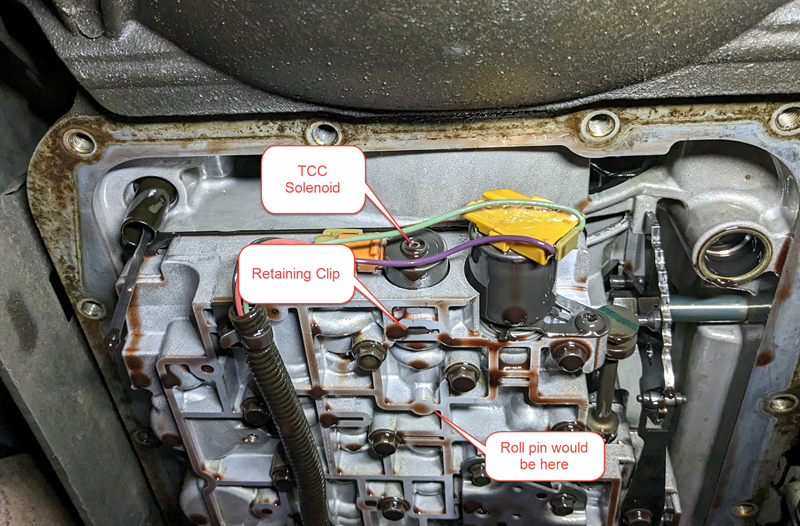
Drain the transmission and remove the pan. You will immediately be able to see the TCC Solenoid on the bell housing end of the transmission. You can actually remove the solenoid right now without pulling the valve body - there is a small retainer clip right below it that pulls out and allows the solenoid to be removed. Unfortunately, you cannot remove the TCC regulator valve itself. There is a roll pin holding it in the bore that is only accessible from above.
Unclip the wiring harness from the 4 solenoids on the transmission and the pressure switch and tuck it out of the way. Remove the 10mm bolt holding the lubrication tube for the output bushing and wiggle the tube out of its bore.
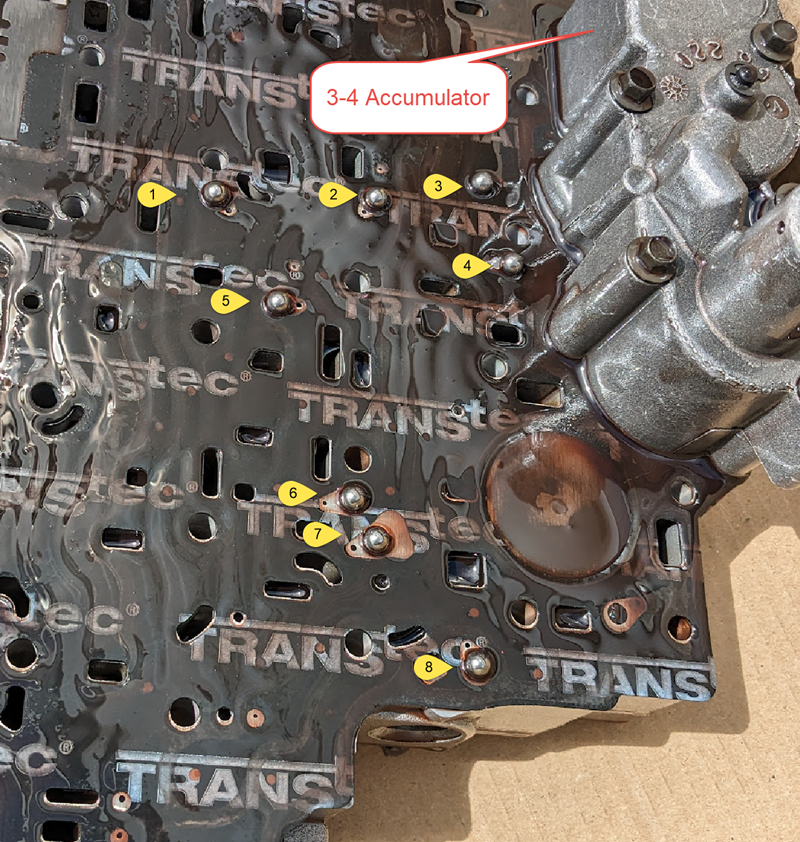
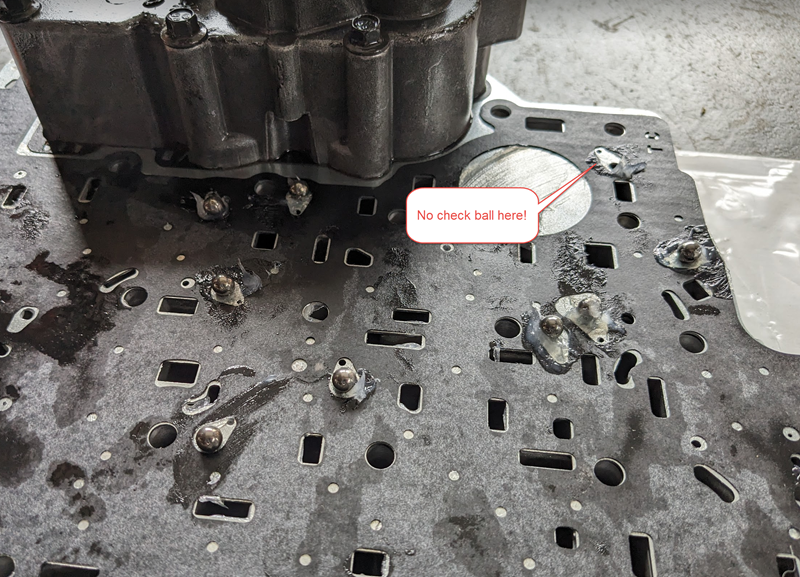
Remove the rest of the bolts holding the valve body in. They are a mix of 8mm and 10mm heads. Remember that 8mm head bolts go in the pressure switch and 10mm is used everywhere else. Once it’s out, take note of where the check balls are! You need to set these aside and make sure they go back in the right places during reassembly.
You will see the 3-4 Accumulator Housing on the top side. You need to remove this as well.
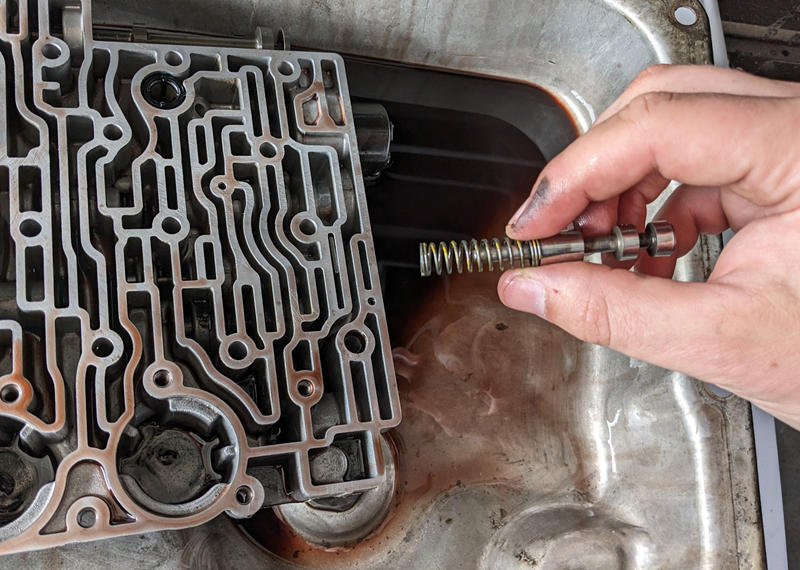
Once the 3-4 Accumulator is off (don’t mix up the springs or pistons!) you can finally remove the separator plate and get access to the roll pin that holds the TCC Regulator valve and spring into the body. This can be an absolute bear to remove, the best way I could find was to thread a 5/64” drill bit into it and then yank it straight out with pliers.

With the roll pin out the valve and spring will pop out. Discard the old ones and install the new ones from TCC. Re-insert the roll pin and install the solenoid.
Install the new separator plate and gaskets, along with the 3-4 Accumulator housing and gasket. Place all the check balls back into position. Do not use grease to hold them in place. Normal wheel bearing grease will not dissolve once the transmission is running, and could block passages inside the valve body. Instead, use transmission assembly gel or petroleum jelly if you don’t have that.
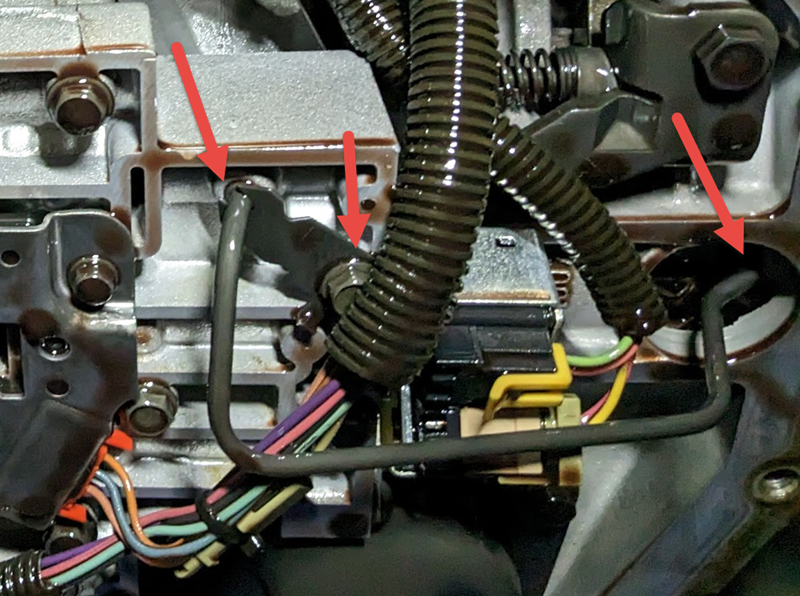
Installation is the reverse of removal. There’s nothing you can really miss except that it’s possible to forget to hook the the PRND321 valve into the correct spot when you install the valve body. Make sure it is engaged to the small boss on the shift linkage like so:
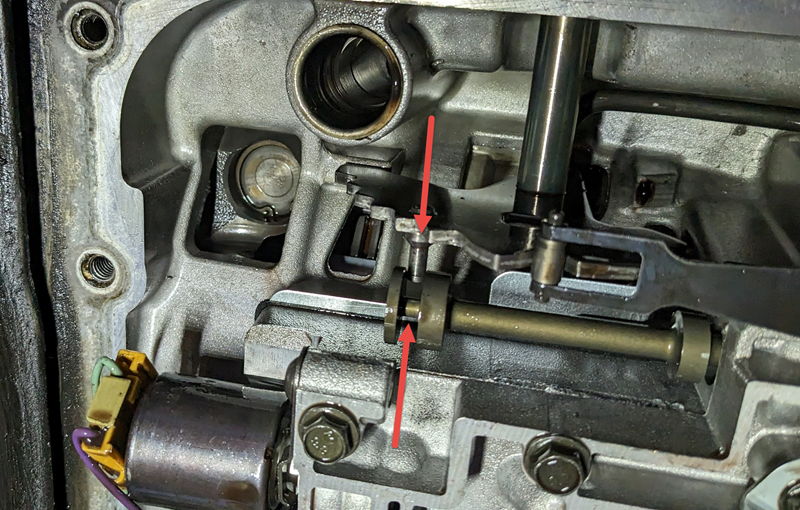
If you forget this, your transmission won’t shift into any gears once you’ve buttoned it up and filled it with fluid… Ask me how I know.
From here on, it should be smooth sailing. Reconnect the electrical harness, re-install the rear bushing lubrication pipe, and torque all the fasteners to 97 in-lb. Leave the lubrication pipe until last, because it blocks one of the fasteners for the valve body.
Install a new filter and pan gasket, refill with fluid (mine needed about a gallon and a half) and you should be up and running.
 Peter Den Hartog - Blog